Does this sound familiar?
I've had customers evaluating color with a banker's lamp, next to a window, and with fluorescent light. My customer and I have to be on the same page otherwise we are going to disagree every time.
When the color of your final product fails to meet customer expectations, the result is expensive and time-consuming rework. Getting color right the first time requires solid processes for visual evaluation of color.
One way to ensure that the sample and product color are evaluated consistently and under the best possible lighting conditions is to use a light booth and to ensure your customer does too. Here are 4 tips to make sure you get the most out of your light booth investment.
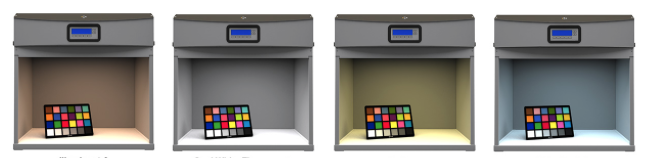
- Choose the correct lighting condition. Evaluate your sample using every light source under which the final product will be seen.
- Minimize surrounding light. The only light in the room should be coming from within the light booth. Light is color, and even a little bit streaming through the window or from a table lamp can change the color perception of your sample.
- Keep your light booth clutter free. Don’t place or store anything inside your light booth.
- Properly arrange your samples. Place the sample on the bottom of the booth, parallel to the light source. If you’re comparing samples, lay them side-by-side so they’re parallel and touching. Even a slight space between colors can trick your eyes.
How do you measure up?
Take our survey on color control in paint & coatings. We’ll share results* in an upcoming webinar so you can measure yourself vs. industry best practices. Complete your survey by midnight EDT October 4th to win free color training.
*all responses will be kept anonymous. Results will be shared in aggregate only.
Questions about lighting?
If you have any questions about color or how to make improvements in your color workflow, feel free to contact one of our Color Experts. You can also explore our light booth solutions for paint and coatings.
