Softproofing – the ability to simulate how an image will appear in print right from your monitor – can save a lot of time and effort in your printing workflow. Although many photographers already rely on it, anyone who designs, approves, prepares or prints brand and color-critical images can also benefit.
With softproofing, designers can create with actual specified colors (no more trial and error!), project owners can approve layouts without physical proofs (predictable color!), and printers know exactly what’s expected of them when they receive a job (no surprises!).
Today we’ll explain how to set up softproofing.
- Ensure your monitor can produce accurate colors
- Calibrate to optimized settings
- Create an ICC profile
- Convert the display so all of your applications are using the profile
…Plus share tips to help you get the most from your calibrated and profiled display.
How to Set Up Softproofing
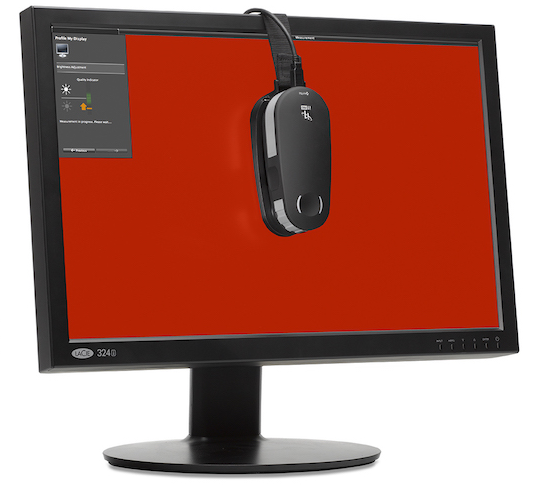 All of our display calibration and profiling solutions are wizard-based and easy to use. Many photographers looking to build fast, easy, professional quality profiles choose ColorMunki™, while our i1 Family is popular for professional photographers, print and packaging pre-media, and industrial customers who want the highest level of color accuracy.
No matter which you choose, here are the basic steps you’ll follow to set up your display for softproofing.
Step 1: Ensure Consistency
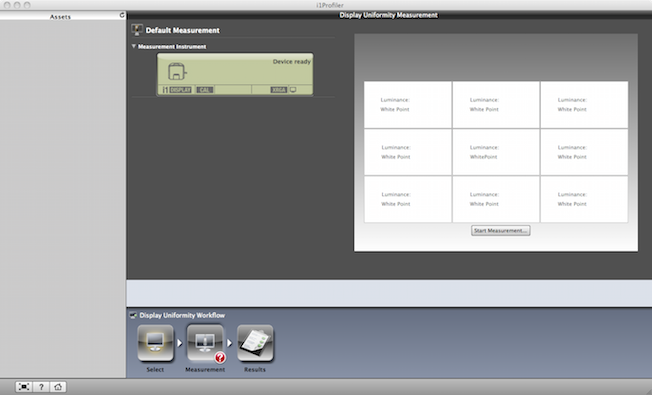
If you’re working from a monitor that is displaying the wrong color, it’s impossible to make good design and editing decisions. The first step is to ensure your monitor is providing uniform color. If you see any inconsistencies across the screen, or if color or brightness randomly fluctuates, it’s time for a new monitor. i1Profiler, part of our i1 Family, includes tools to measure and evaluate the uniformity of your display.
Step 2: Calibrate
Optimized settings provide the best reproduction on-screen. When you calibrate, you’re optimizing your monitor for contrast, brightness, and color temperature.
The steps to do this vary between brands and types. Your monitor’s display controls may be located on the monitor itself, on the keyboard, or within the operating system control panel. Some displays do not have all of the adjustments, but the calibration software will try to compensate. Monitors that do have these controls can usually be calibrated to a better level and rely less on the software to make the adjustments.

Here are some guidelines for choosing the right calibration settings.
- Gamma values in monitor calibration software can range from 1.00–3.00; the higher representing a darker appearance with more contrast. The native behavior of most monitors today is 2.2. Calibrating to this setting will provide the smoothest gradients. Selecting a value that is very different than the native gamma of the display can introduce banding or posterization in the gradients.
- Contrast Ratio determines the dynamic range between whites and blacks, allowing you to set your whitest white and your blackest black. Most profiling software programs have a set value that cannot be changed, but X-Rite’s i1Profiler allows you to edit this setting.
- White Point on monitors usually ranges from 5000–9300 Kelvin (K). Lower values are more yellow, while higher values are more blue. When the white point is set to “Native,” the program uses the monitor’s current white point without changing it. The white point of your monitor should match the white point of your prints under proper viewing conditions.
- In the graphic arts industry, D50 is the standard. Graphic artists who design for print on an offset press should set the monitor’s white point around 5000K, but many users find 5000K to be too warm and dull and prefer higher settings like 5500 or 6500.
- Sign shops and photographers may find that setting the white point at 6500 more accurately represents the cooler white point of photographic or vinyl material when viewed under D50 Daylight.
- Since LCD monitors can be brighter, they can be calibrated to any value between 5000 and 9300 without diminishing the brightness. However, we still recommend 6500K for general graphics use. Some advanced users can try different values (between 5000 and 6500) to find the one that best matches the look of their paper under their specific viewing conditions.
- Monitor Luminance values describe how bright the monitor appears. The monitor should appear brighter than the room lighting. Luminance is measured in candela per square meter (cd/m2).
- LCDs are capable of higher levels, as high as over 300, but values between 80 and 160 will provide enough brightness to see details in shadows without being uncomfortable on the eye.
- If you’re working in optimum room lighting, values of around 120 are often preferred. However, if your ambient room lighting is rather bright and you have no control over it, you may need to adjust to higher monitor luminance.
- Some monitor calibration software programs allow users to set desired settings. This can be useful to get multiple monitors to match more closely. Another option available in some software is to automatically adjust the luminance based on the brightness of the room.
- Monitor Calibration creates a curve that adjusts the monitor’s behavior to match the selected white point and gamma and saves it to the computer’s video card. As part of calibration, some software also includes advanced options to help you adjust the monitor’s front panel controls for even better results.
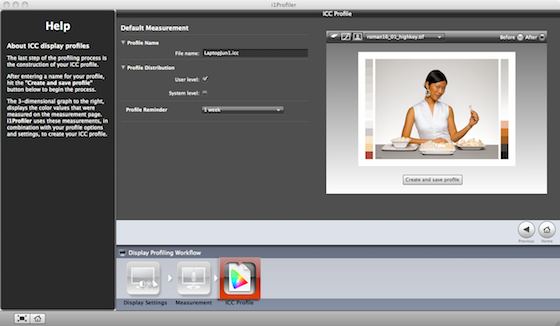
Step 3: Create an ICC Profile
Next, the software will create your ICC profile. It is a good idea to create a monitor profile naming convention that includes a description of the monitor and the date.

Step 4: Convert the Display
After your monitor profile has been built, graphics applications that are ICC compliant such as those from Adobe® will automatically use the profile to display color correctly. Do not select the new monitor profile as an RGB working space in any graphic applications or print drivers! Your graphic applications will automatically use the profile for screen previews only.
Getting the Most From Your Softproofing Workflow
Verify your new profile is accurate. The Display Quality tool in i1Profiler can test your display’s accuracy in representing the colors that will be printed. It does this by comparing the displayed colors to values in a selected print standard, such as SWOP or GRACoL, or even the accuracy of PANTONE® Colors. Since you see the comparison right on screen, you’re able to judge results for yourself.
Consider viewing conditions. Since ambient light and colors around your monitor will affect your judgment of color, room lighting should be set low and the colors around your monitor should be neutral.
Calibrate and profile often. Regular calibration is necessary to correct the normal color drift that happens over time. Individuals with demanding color expectations may need to repeat these steps weekly, while hobbyist photographers may only calibrate once a month.
Make it part of a complete color-managed workflow. What you capture on your camera, see on your monitor, projector or mobile device, view on your proofs, prints and presses, and share online has to match or you will never be happy with the result. For the most accuracy, every device that touches your color must be profiled. Our i1 Family makes it easy, and there’s an option for every color need.
Share your knowledge! Ensuring everyone in your supply chain – from photographers, designers and brand owners to pre-press and printers – follows the same color management workflow will mean more accurate color and less work for you. Be sure to share this article so you can work confidently in your color workflow!
Need Softproofing Help?
Get in touch to ask questions or for help choosing the profiling tools that are right for you.
