How much time, paper, and ink do you waste re-printing images because the color isn’t right? Before you blame your printer, consider your monitor. When you work on an un-calibrated and un-profiled monitor, you can’t trust the colors you see on-screen, making it hard to make good editing decisions.
Luckily, monitor calibration and profiling is a breeze with i1Profiler software. i1Profiler comes with i1Basic Pro 3 and i1Basic Pro 3 Plus. Wizard-based, it walks you through every step in the profiling process. Basic and advanced modes allow you to modify your settings based on your calibration needs.
It allows you to calibrate and profile nearly any monitor from any manufacturer to desired settings. This includes Laptop displays or more advanced external monitors. This enables you to:
- See true color content from your files on screen
- Simulate on screen how colors will look in a desired output process (monitor-to-print match, also called soft proofing, requires availability of printer profiles)
What is the Difference between Calibration and Profiling?
Calibration adjusts (changes) the color properties of your display to certain parameters like white point, luminance, contrast, and gamma. The ICC profile describes, but does not change, how your monitor is displaying color. The ICC profile is essential for your applications to convert and display colors accurately. i1Profiler will guide you seamlessly through these two processes.
Ready to trust your on-screen colors? Here are the ten simple steps you need to follow to calibrate and profile your monitor or laptop display.
How to Calibrate Your Monitor
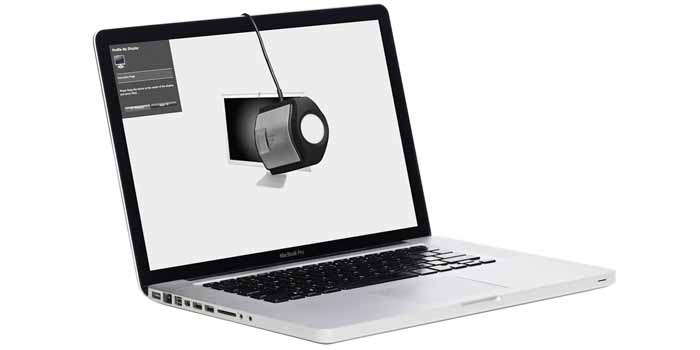
Before you begin, turn on your display for about 30 minutes so it can warm up.
Make sure to quit any applications that might interfere with the calibration, such as screen savers and e-mail and messaging apps with pop-ups.
If you’re profiling an iMac or Mac laptop display, make these adjustments in System Preferences:
- In Displays, turn off Auto-Brightness-Adjustment and NightShift.
- In Universal Access (or Accessibility on MacOS Ventura) > Displays, set the Contrast Slider to Normal (left position) and turn on Reduce Transparency.
- In Energy (or Battery on MacOS Ventura), turn off the Energy Saving options for Laptop Displays.
- In Energy (or Battery > Options on MacOS Ventura) turn off the Automatic Graphics Switching on laptops with dual graphic cards
If you are using an external display with advanced color controls, make yourself familiar with the operation of the On-Screen-Display (OSD) menu, especially for adjusting brightness, contrast, and color temperature (RGB Gains). See your monitor’s user guide for more information. Ensure these settings:
- Turn off any options like High Brightness, Dynamic Brightness Adjustment, or Eco Mode.
- Reset the display’s color settings to factory defaults and make sure it is set to Custom color mode, not preset to a mode like sRGB or AdobeRGB.
- If you are using a laptop, make sure it is connected to wall power while performing the calibration and profiling.
Let’s profile!
Step One: Get started.
Connect your device to your computer and launch i1Profiler. Make sure i1Pro 3 / i1Pro 3 PLUS device is selected in the bottom right in the main screen. Select the Basic User Mode on the right, then click the Display Profiling button on the left.

Step Two: Choose your display.
Across the bottom you’ll see your workflow diagram. These are the steps you’ll complete to create your new display profile.

If you have more than one display connected, select the one you would like to calibrate and profile. This will move the software window to the center of the selected display.
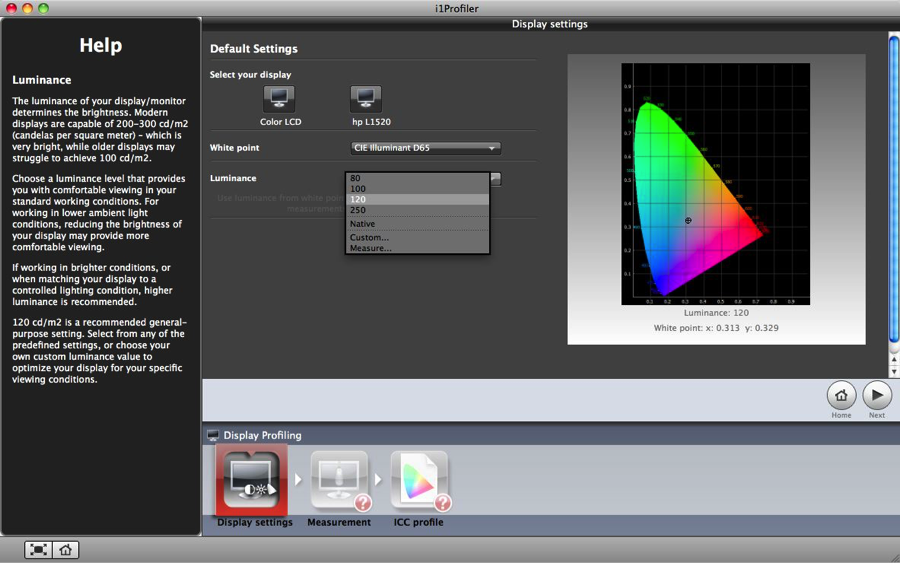
Step Three: Select the white point for your profile.

Here’s some guidance.
At the top are the standard CIE Daylight Illuminants. D65 is the choice for most people working in photography and graphics. D50 is commonly used in prepress.
Native will use the white point of the monitor. This setting is for those of you already set the white point of your monitor through some other method (such as the monitor’s menu) and don’t want to change it.
Near the bottom are the options to set custom white point values – either using a Daylight Temperature slider control for values from 5000 to 7500, or entering the xy chromaticity coordinates.
If you’re working in a controlled lighting condition, there is an option to match your monitor’s white point to the measured white point of your ambient light. To take an ambient light measurement, click Measure and follow the prompts.
Step Four: Select the Luminance.
Most LCD users find 120 is bright enough to judge color and detail in highlights and shadows on a display used on a slightly dimmed room light.
Hints:
- There is a dependency between illuminance of your room light and luminance of your display. The brighter your room light, the brighter your display’s luminance would need to be set in order to see details in shadows and highlights, similar to viewing your mobile device in a dimmed room versus in bright sun light.
- In an ideal color editing environment, the room’s brightness and color temperature should be consistent with around mid-daylight and 64 lux. However, this is not always possible in the real world, so using a monitor hood can protect the monitor against changing ambient light and light reflections. A display luminance of 120 will work fine.
- If you are using a standardized viewing light box to compare prints side-by-side to colors on your display (soft-proofing), a higher display luminance of 160 is a good choice because viewing light boxes have a bright light of around 2000 lux.
Use Native if you don’t want to change your monitor’s luminance value. Custom is available if you want to select any value between 80 and 250.
If you’re using an i1Pro, there is also an option to have the software automatically adjust your display’s luminance to match the ambient room light. Click Measure and follow the prompts.
Click Next.
Check out our blog to learn the difference between luminance, illuminance and brightness.

Step Five: Prepare your device.
If you see Device Ready, you don’t need to calibrate. If you see Device not calibrated, click the Calibrate button.

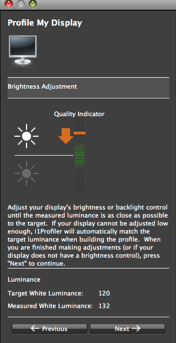
Step Six: Set up your display hardware.
Automatic display control takes advantage of a feature that’s available on some displays, allowing the software to access the display’s internal calibration controls. Or, you can choose to adjust your brightness and contrast manually which is recommended.
Click Start Measurement.

 The software will prompt you to hang your measuring device on the display. Click Next to continue.
The software will prompt you to hang your measuring device on the display and asks you to select what type of color controls are adjustable on your display. Laptop or iMac displays usually only allow you to adjust brightness, but leave Contrast and Brightness enabled. External displays also allow you to adjust RGB gains. In this case, turn on RGB Controls. Click Next to continue.
The software will measure your display’s contrast. On most monitors the contrast is already set during manufacturing. If adjustment is needed, use the adjustments in the menu on the front panel of your display to bring the indicator to the middle of the green zone and click Next. If no adjustments are needed, i1Profiler jumps to the next step.
If you enabled RGB Controls, the software will measure the display’s white point. Use the RGB Gains in the menu on the front panel of your display to bring the indicators to the middle of the green zones to match the white point you selected in the first step. Start with the color channel, which is farthest away from the ideal zone. When all channels are in the green zone, click Next. The software will measure the display’s brightness. Again, use the controls to bring the indicator to the middle of the green zone to match the luminance settings you selected in the first step. Click Next.
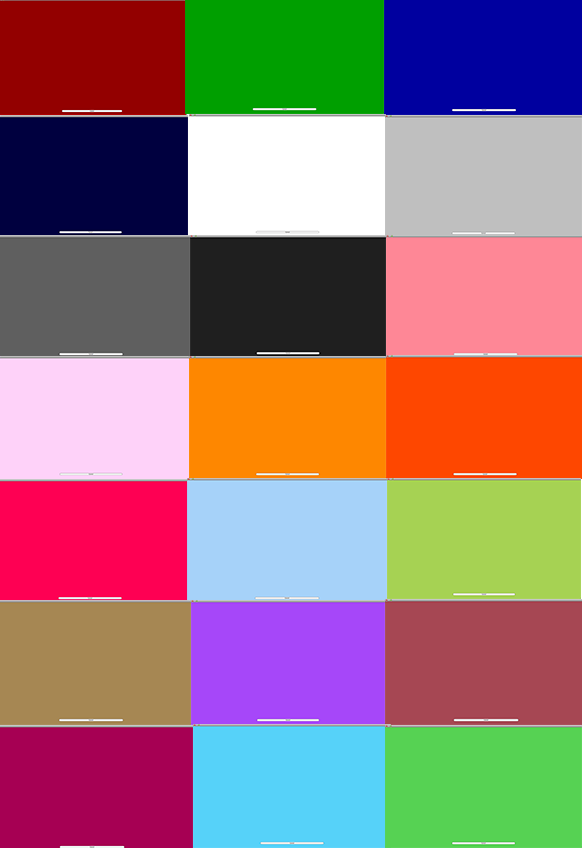
A series of colors will be displayed and measured. You will not recognize it, but during the measurement procedure, a couple of things are happening. The calibration curves will be finalized and loaded on-the-fly into your computer’s graphic card. Additionally, colors will be displayed on the now calibrated display, and these measurements will later be used to build the ICC monitor profile.
Step Seven: Review the results.
This is a preview of the measurement results on your display. The generic RGB values appear in the upper left corner of each patch, and the measured values in the lower right. Don’t worry, the preview may show huge differences between generic and measured values. It just intends to confirm that measurements are completed. Click Next.

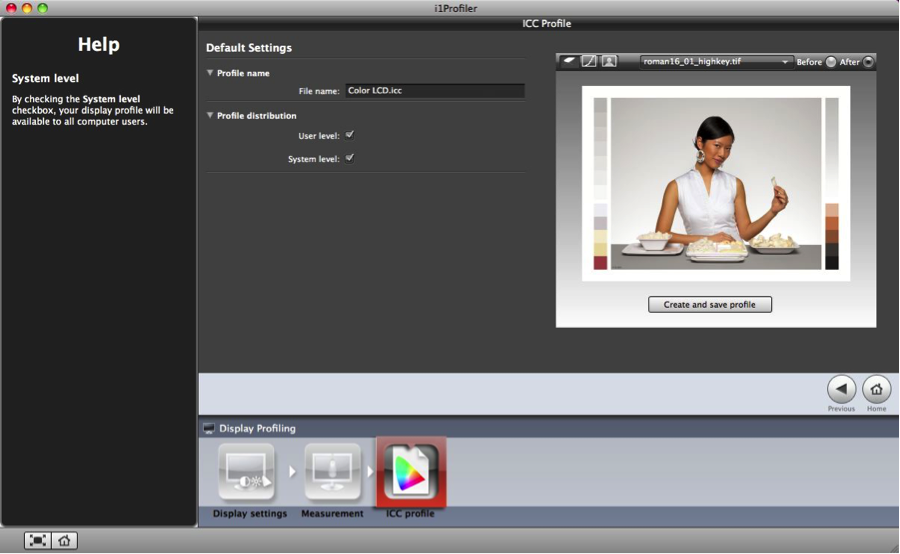
Step Eight:Name and Save your Profile
Choose a name that includes the name of the monitor and the date if you wish.
If you are on Windows, ICC profiles will always be saved on System level. Click Create and Save Profile. The profile will automatically be set as the current profile in your Mac or Windows system. The calibration curves are part of the ICC profile and will automatically be loaded to the graphic card.
Hint: Here is where ICC profiles are saved:
- Mac: Mac HD: Users/username/Library*/ColorSync/Profiles *hidden folder: to access it, press alt/opt key and go to Mac menu Go > Library
- Windows: C:/Windows/system32/spool/drivers/color
Step Nine: Compare the before and after.
Once the profile is complete, radio buttons allow you to compare how the image looked before, and after, the calibration.
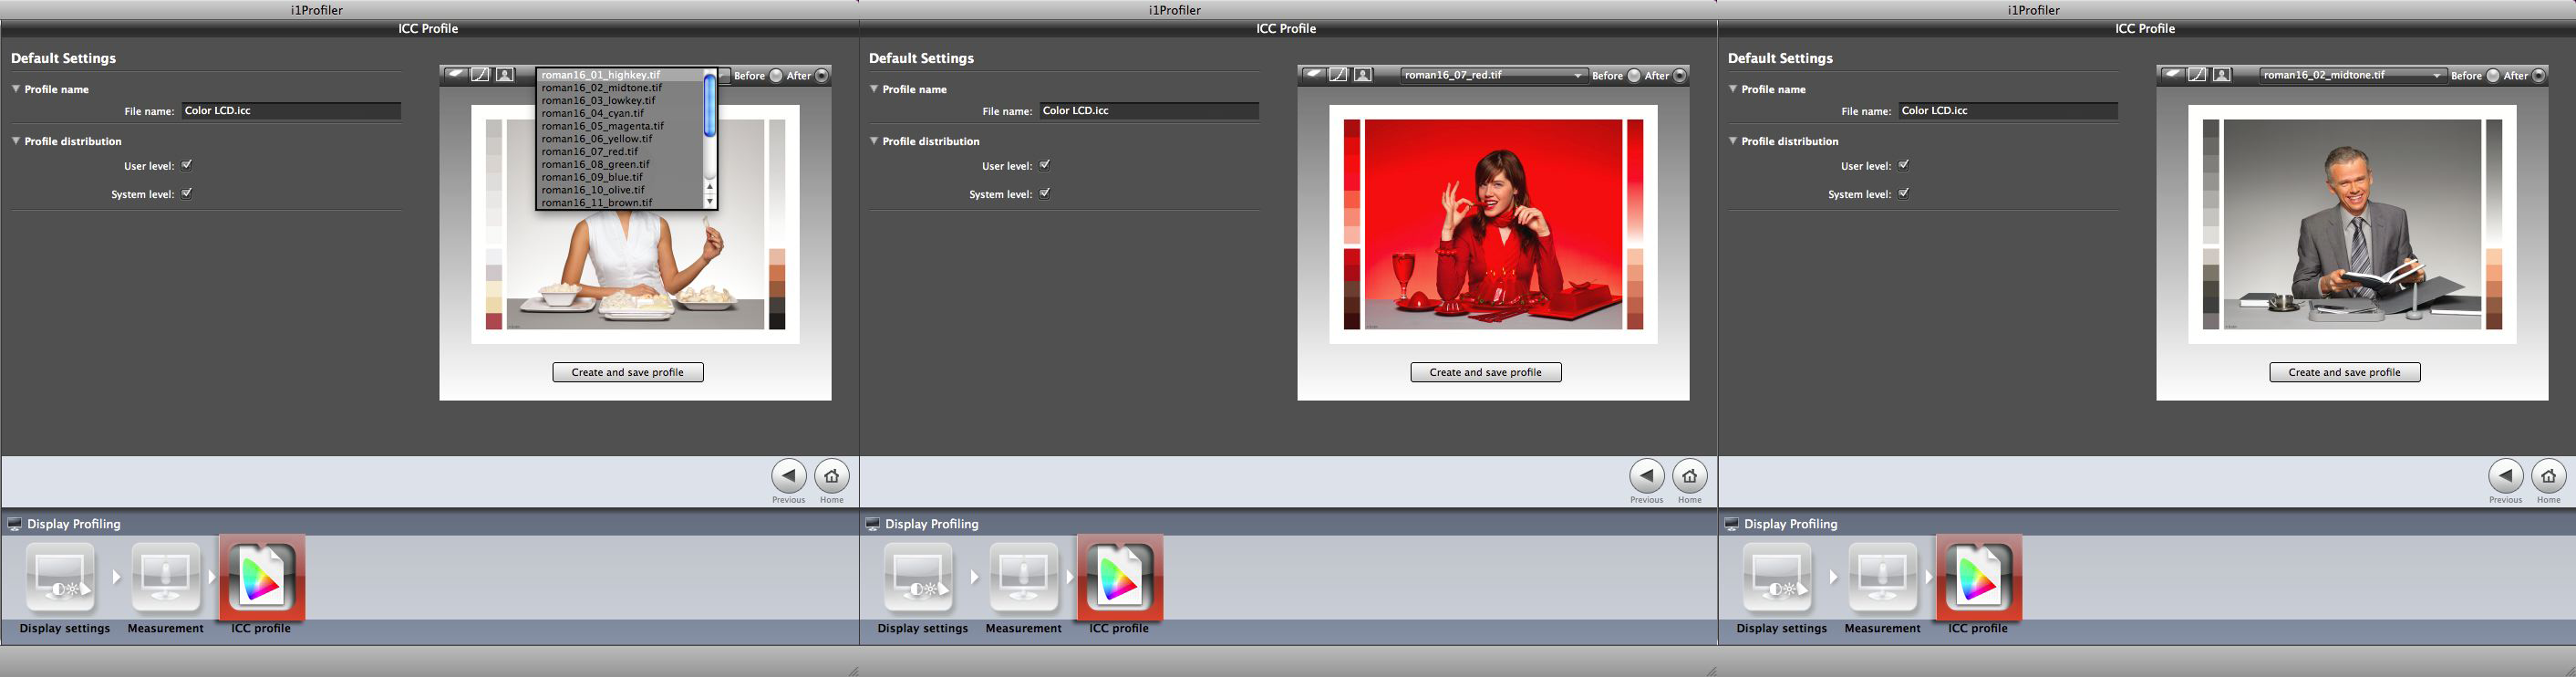
Other images are available behind the drop-down to help you evaluate your monitor’s colors.
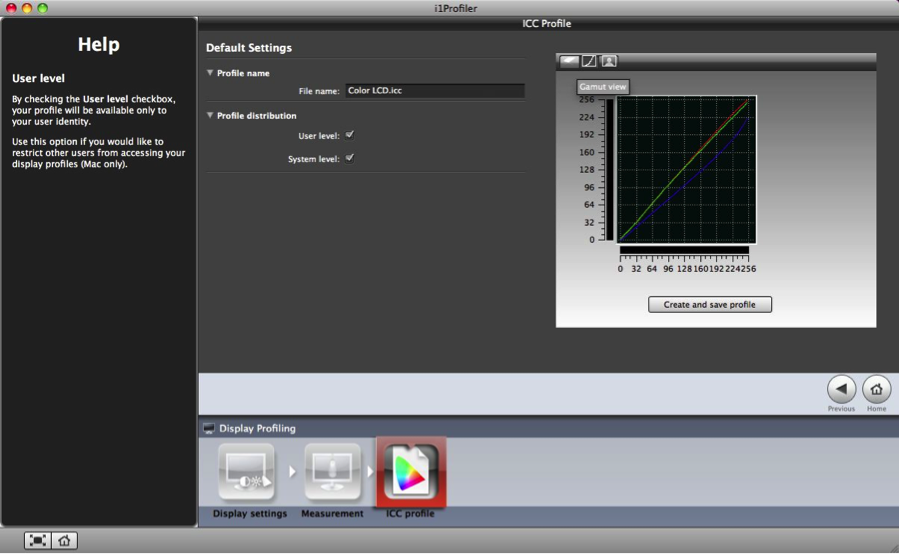
If you’re curious, click the middle Luts button (looks like a graph) to see which calibration adjustments i1 Profiler made to the computer’s video card. This fine-tuning helps match the display to the selected white point and gamma settings.
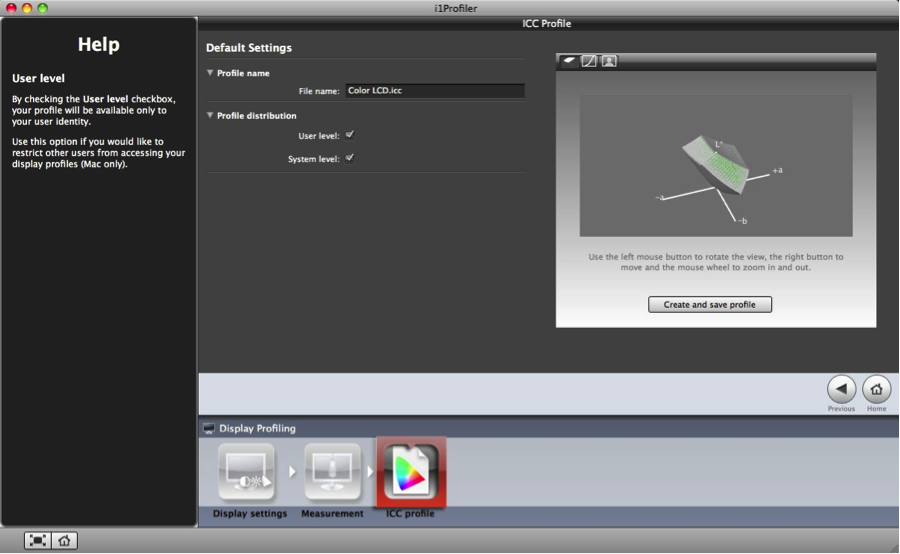
A gamut view is available by clicking the first button. You can also compare the gamut size of two profiles.
Step Ten: Start editing with confidence!
Your monitor is calibrated and profiled. ICC compatible applications will now automatically consider your monitor profile and temporarily convert color content in your files from their source profiles (e.g. AdobeRGB, sRGB) to your monitor profile. This way you will see accurate color (what is in your file) on screen.
If you enable soft proofing in an application, you can simulate on your display how your colors will look in a certain printing condition.
Want to learn more about the basics of managing color? Check out our free Display Profiling eLearning course, a video presentation of this blog. To learn how to expand to a complete color managed workflow, check out our Color Control Freak eLearning.
Featured Solutions to Calibrate Your Monitor
i1Profiler software comes with the i1Basic Pro 3 and i1Basic Pro 3 Plus measurement devices and allows you to:
- Calibrate and match up to four displays connected to a single computer
- Calibrate unlimited displays connected to different computers for consistent viewing
- Quickly and easily create custom monitor and projector profiles that ensure the colors you view are true
- Verify soft proofs and print quality
- Easily capture and manage spot colors
Which device is right for you?
i1Basic Pro 3
- 4.5mm aperture
- Ideal for smooth paper
- Measures smaller patch sizes for less material waste and faster profiling on substrates
i1Basic Pro 3 Plus
- 8mm aperture
- Ideal for highly textured paper and non-paper materials like textiles, canvas, glass, ceramic, and films
- Measures larger patch sizes for more accurate results on challenging substrates
- Includes polarization filter to achieve better highlights and shadows on unique substrates
To learn more about i1Basic Pro 3 and i1Basic Pro 3 Plus, visit xrite.com.
For more information about X-Rite display technology partner calibration solutions, visit calibrite.com.
