Cleaning Your SP Series Instrument
Spherical instruments are susceptible to dust and dirt, which will adversely affect measurement accuracy and lamp life. To properly maintain your X-Rite SP60, SP62, SP64, and/or 939 you should periodically follow the cleaning procedure below. The frequency of cleaning will be related to the environment in which the instrument is stored and used. Some extreme environments may require a daily cleaning.
-
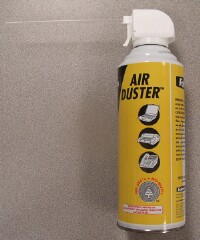
To perform the cleaning, you will be using compressed air. We recommend that you use "canned air" with an extended nozzle (see example below), which is available at most computer/electronics stores. NOTE: When using canned air, the can must be held upright. Inverting or rotating the can will cause propellant to be sprayed, which can damage the optic assembly of your instrument.
You can also use a compressed air line, provided the air line has a system for removing oil and water. This is necessary as these can also harm the instrument if present.
-
Disconnect the instrument from any cables that are connected (i.e. the serial communications cable and the power adapter).
-
Connect the nozzle (typically a flexible straw-like attachment) to the canned air. Spray a long burst of air from the can away from the instrument.This will ensure that any built up propellant is not sprayed into the instrument.
-
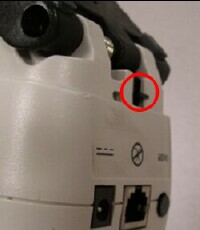
Flip the instrument over, depress the shoe release, and flip the shoe out of the way (see photos below).
-
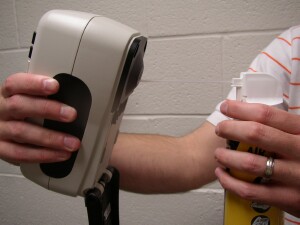
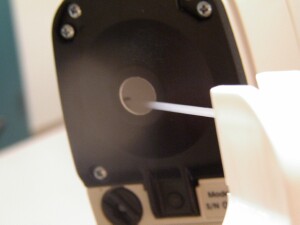
Hold the canned air in one hand, and with the other hand, hold the instrument. Rotate the instrument so you can put the end of the nozzle directly into the sphere, while still holding the canned air upright (see photo below).
-
Depress the trigger on the canned air, and while the air is blowing into the sphere, rotate the instrument to allow air to blow across the entire surface of the sphere.
-
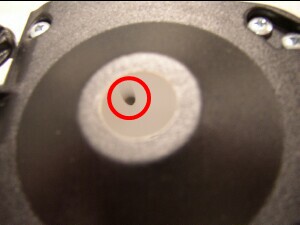
Carefully position the nozzle into the small inlet port (see left photo below) and give several quick bursts of air (see right photo below).
-
Position the instrument right side up for a few moments, and allow any loose particles to fall out of the sphere. Repeat steps 6 - 8.
-
Close the shoe, and reconnect the instrument to any cables.
-
Calibrate the instrument.
